The Plumber #1: How to Install a Bidet Spray
How to install a bidet spray in your UK rental property.
Important
Introducing: "The Plumber" series
Much like The Electrician series, but for water.
Bidet sprays (or "bum guns") are a staple in many Asian households but remain a rarity in the UK. For many of us, especially the Vietnamese students, they are an absolute bathroom essential.
In this tutorial, I'll walk you through how to install a bidet spray attached to your sink tap. This method is non-invasive, requires no drilling or complex plumbing, and is perfect for rented accommodation.
Step 0: Gather the Right Tools
First, you'll need a bidet spray kit that attaches to a sink faucet. You can find these easily on Amazon or eBay. Look for a "Bidet Spray" kit.
- Bidet Kit: Recommended Kit
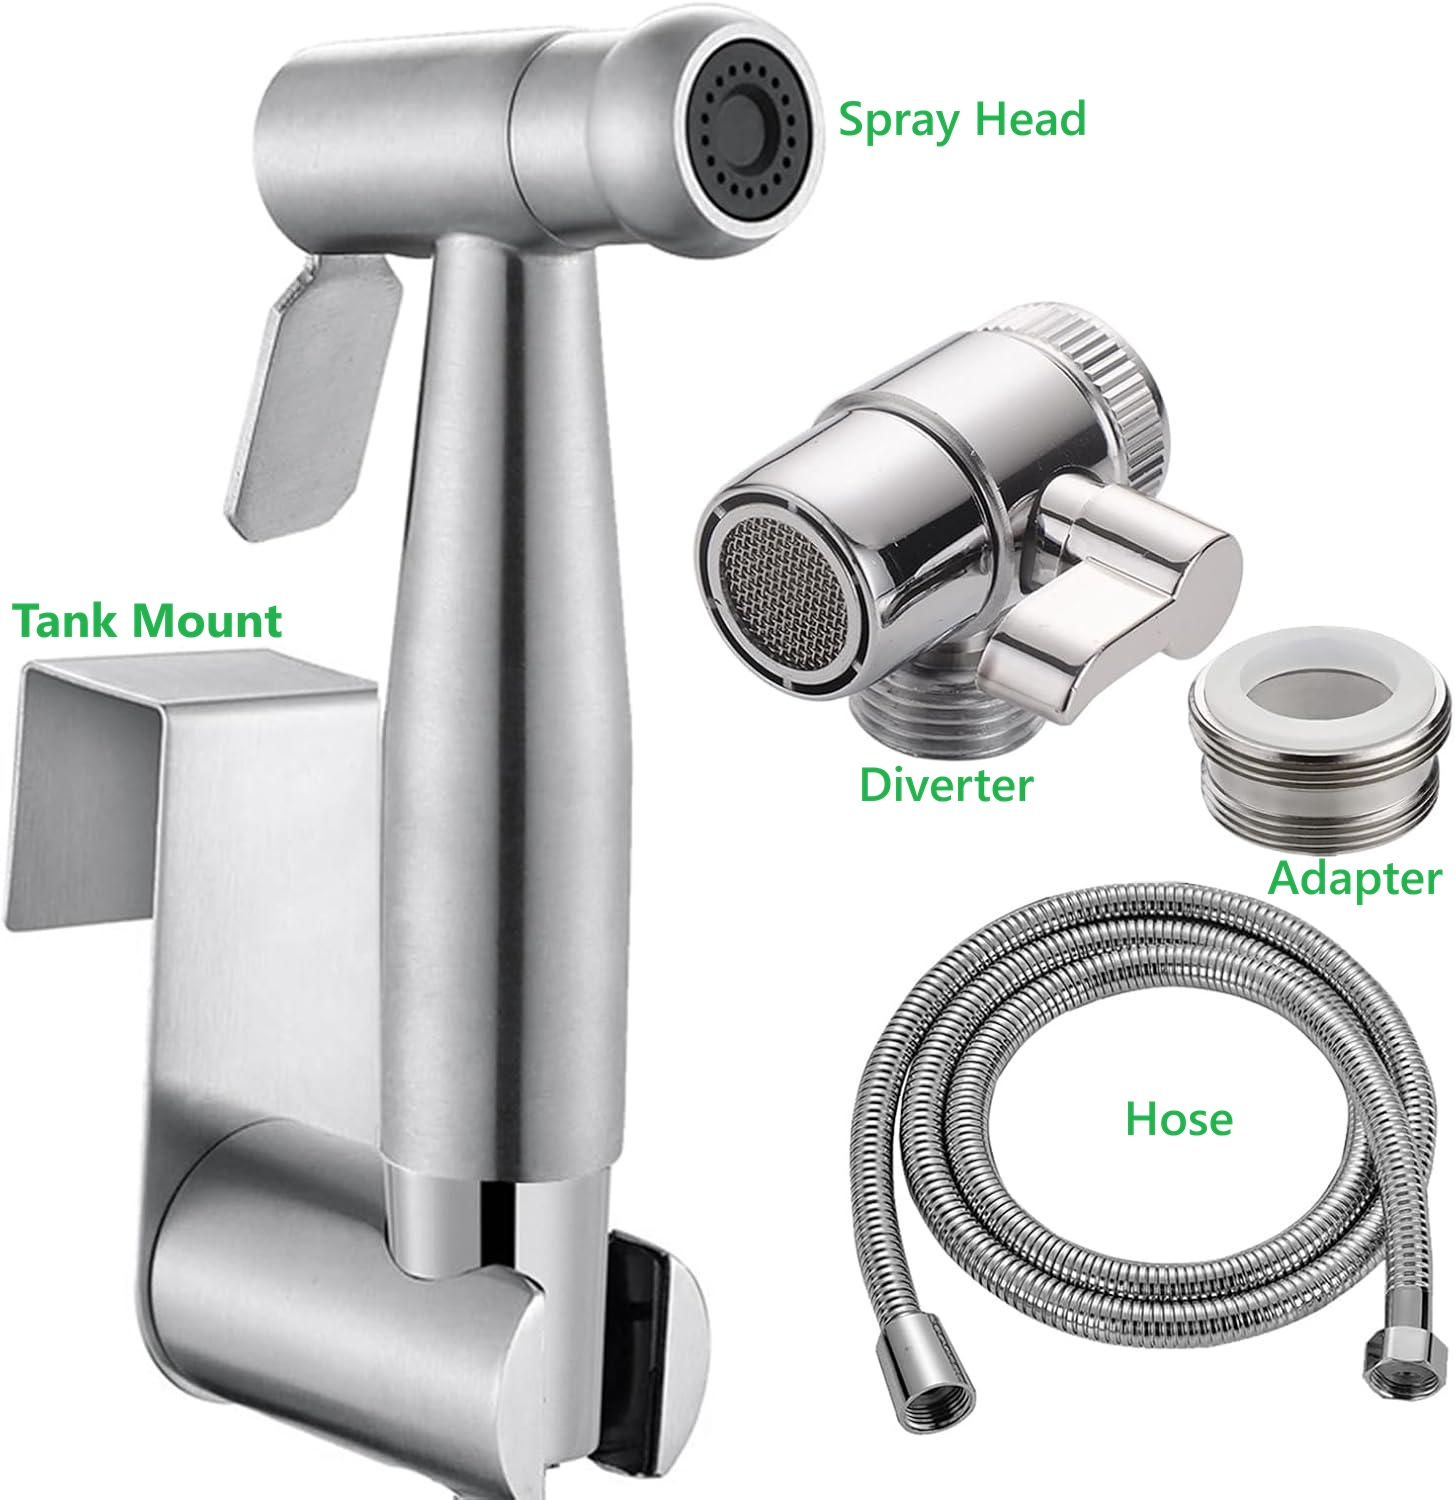
Bidet Spray Kit, source: Amazon
Check your tap:
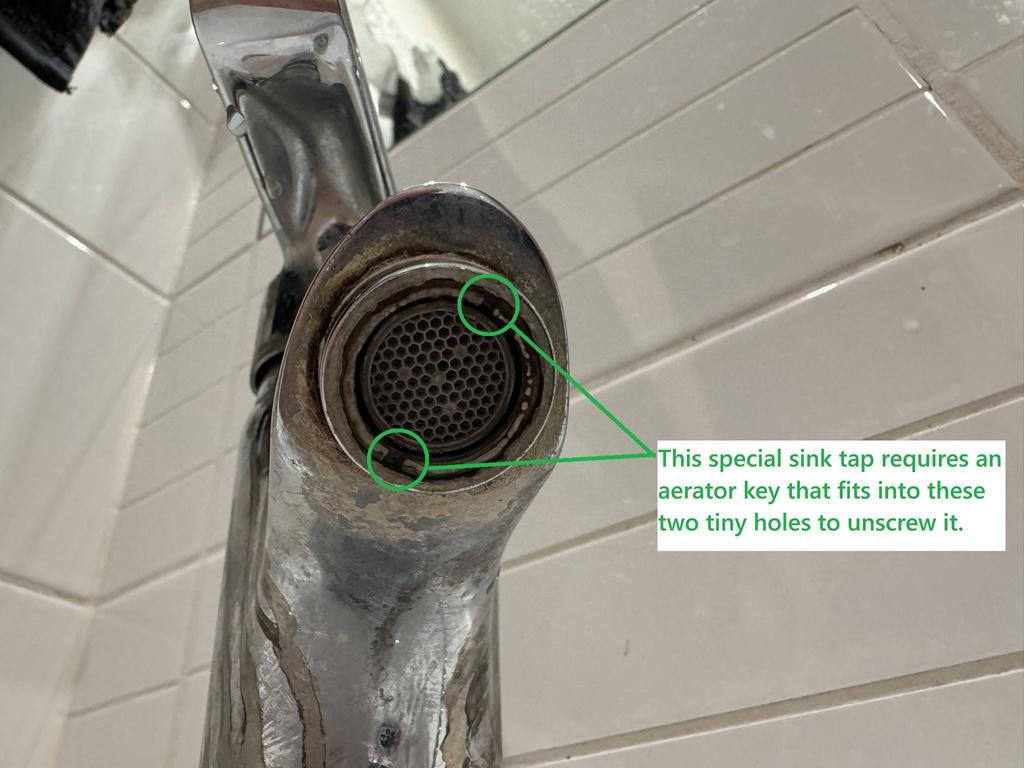
In many modern UK rental properties (student accommodation, apartments), the bathroom sink tap has a recessed aerator that is flush with the spout. You often cannot unscrew this by hand or with a standard wrench.
- Aerator Key: If your aerator is flat against the tap, you will likely need a set of Aerator Keys to unlock and remove it.
- PTFE Tape (Plumber's Tape): A roll of white Teflon tape to help seal the threaded connections and prevent leaks.
Note
Note: If your aerator has only two tiny holes instead of grooves, you may need a specialized tool like the Danco 10909 Multi-Use Aerator Key (or similar "pin" style key).
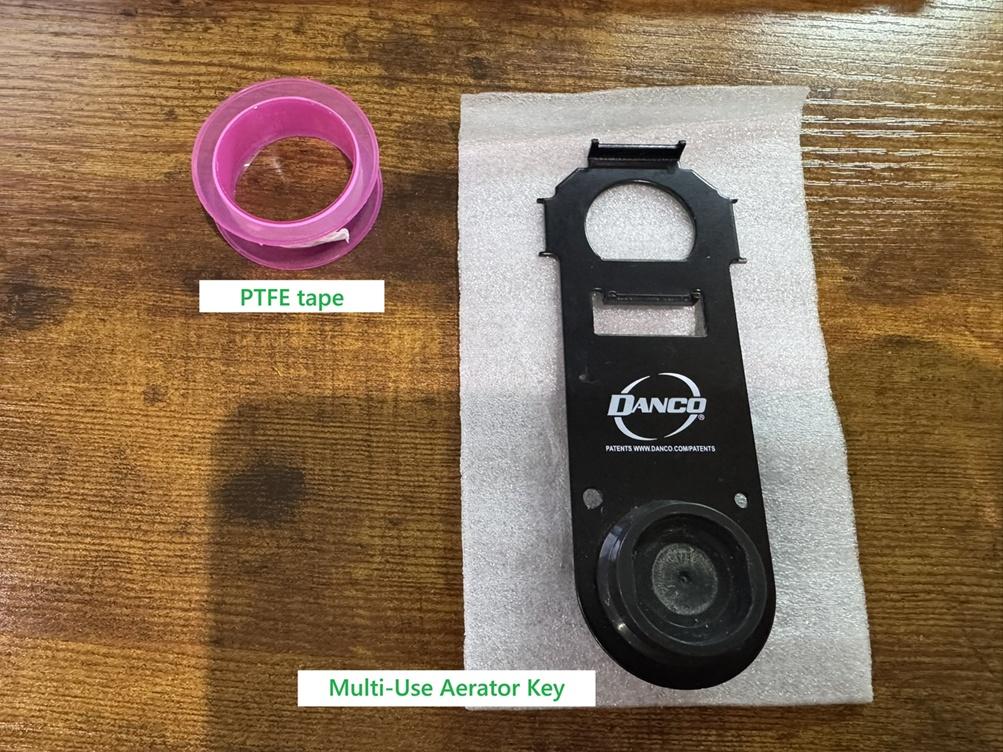
Aerator Key and PTFE Tape (optional)
Step 1: Remove the Old Aerator
- Identify the Aerator: Look at the tip of your tap where the water comes out. If there's a small mesh screen, that's the aerator.
- Unscrew It:
- If it protrudes, try unscrewing it clockwise (looking from the top) or counter-clockwise (looking from the bottom).
- If it's recessed, select the correct size key from your Aerator Key set. Insert the key into the grooves and twist to unscrew.
- Clean: Wipe the threads on the tap clean to ensure a good seal for the new connection.
Removed Aerator
Step 2: Install the Diverter Valve
The bidet kit comes with a "diverter valve"—this is the T-piece that splits the water between the sink and the spray.
- Find the Adapter: Your kit should come with several thread adapters. Find the one that fits your tap's threads (where the old aerator used to be).
- Attach the Diverter:
- Apply PTFE Tape: Wrap the PTFE tape 2-3 times clockwise around the threads of the adapter (and the tap threads if necessary). This ensures a watertight seal.
- Screw it on: Screw the diverter valve onto the adapter. Make sure to use the rubber washers provided as the primary seal. Hand-tighten it.
- Tip: Don't overtighten, as you might strip the plastic threads.
Step 3: Connect the Spray Hose
- Connect one end of the flexible hose to the side outlet of the diverter valve.
- Connect the other end of the hose to the bidet spray head.
- Ensure washer seals are in place at both ends.
Tip
Leaking?
If you see drips coming from the connection points, try adding a few more wraps of PTFE tape to the threads and ensuring the rubber washers are seated correctly.
Step 4: Hang the Spray
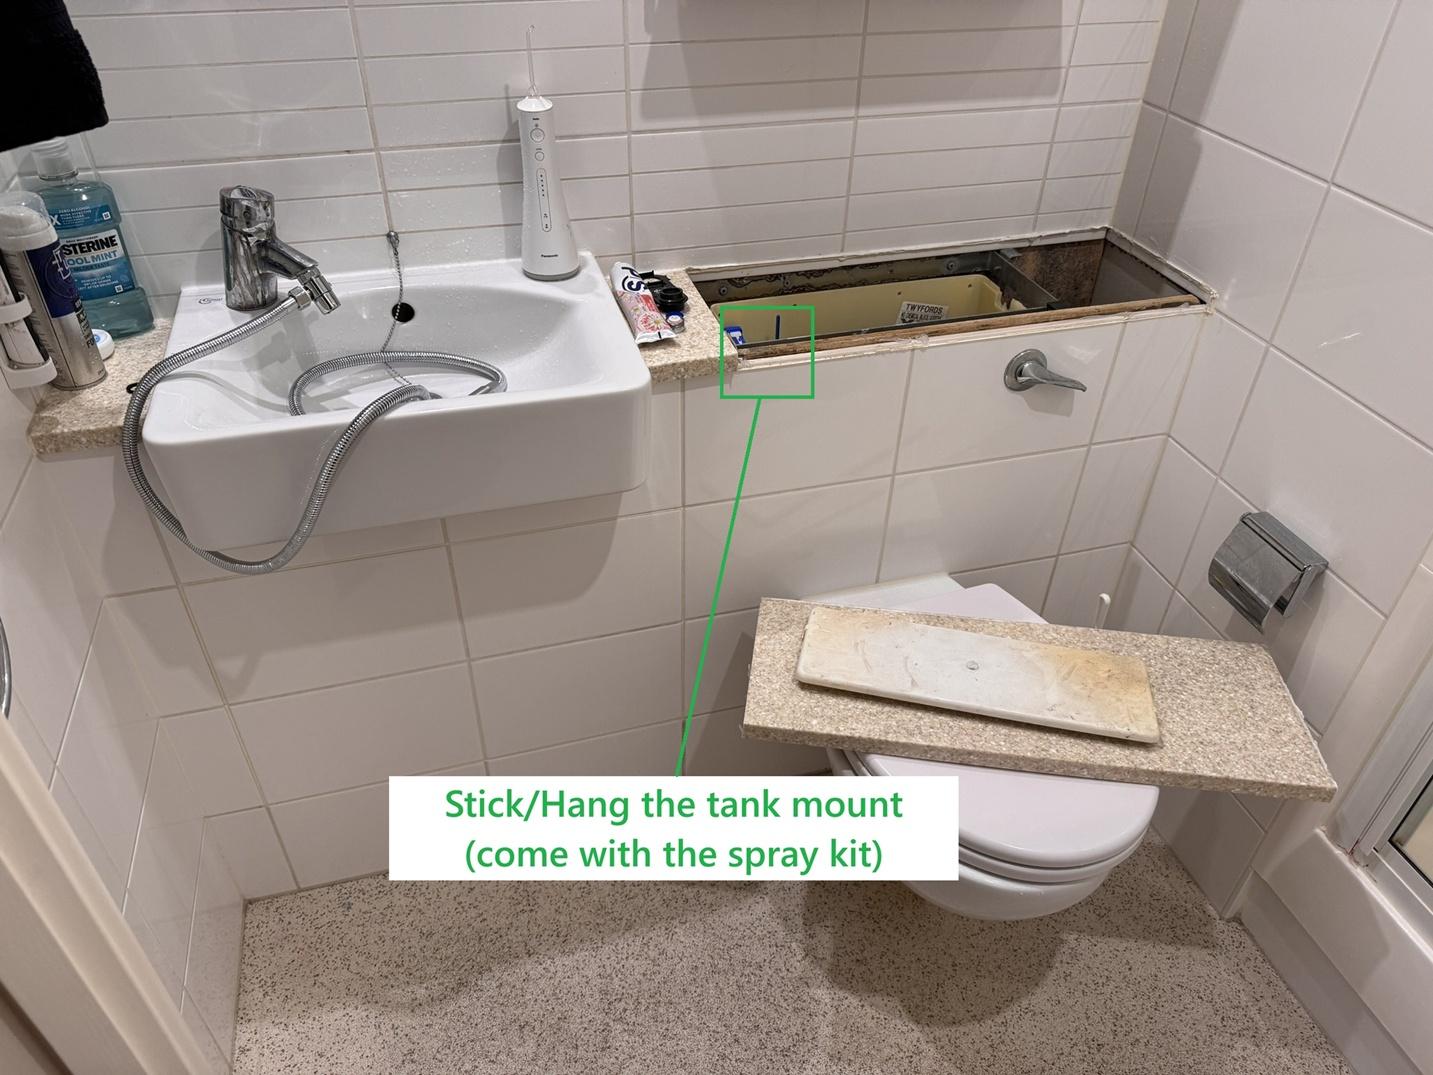
Since this is a rental-friendly guide, we want to avoid drilling holes in the wall.
Most kits come with a tank mount or a holster that can hook onto the toilet tank. Alternatively, you can use strong double-sided tape (like 3M Command strips) to stick the holder to the tile wall.
Mounted Spray
Step 5: Test and Use
- Turn on the tap water.
- The Diverter Switch: There should be a lever on the diverter.
- Down/Up: Water flows into the sink as normal.
- Turned: Water is diverted to the spray hose.
- Test the spray into the toilet bowl or sink to check for pressure and leaks.
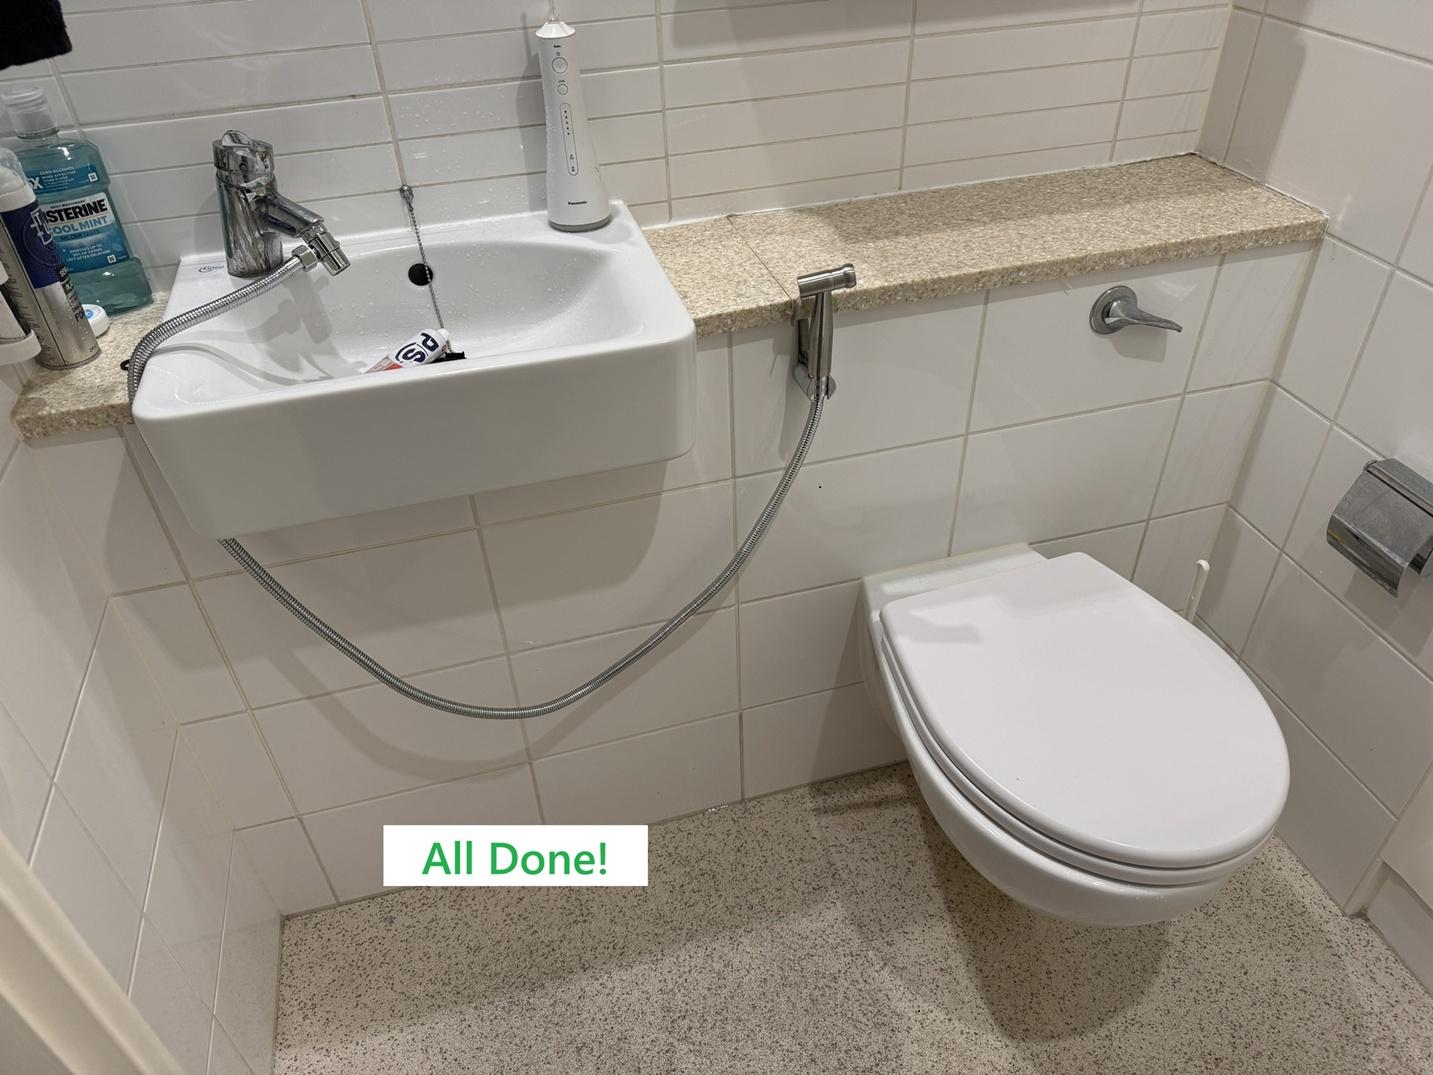
All done
Tip
Safety First: Always turn off the diverter valve or the tap when not in use. Constant water pressure in the hose can cause it to burst over time, leading to flooding!